Sunday, December 30, 2012

Well, I Have this Sore Knee.....

Honest....I really do. It slows me down, not to mention the countless hours in the chiropractor's office getting laser treatments etc.  You know where this leading, right?  As I was looking through my 2012 blog posts I was a bit flabbergasted to discover only one finish....you heard me. I blame it on that blasted sore knee.

And that brings up another issue or should I say resolution, it is that time of year, after all. I like my sweets as much as I like my fabric......I think that says it all.

 My poor knee needs less body mass to carry around, and that's it.  I might even be brave enough to keep you posted on my progress...note, I did use the word might. A little support from fellow quilters with a sweet addiction might be nice.

Besides having only one finish (there, I said it again),  the year was rather wonderful.  I noticed I had several firsts:

It was Fabulous Experience....the blocks I received were beyond all my expectations and I hope to create an amazing quilt in 2013. Thanks to all you wonderful Free Bees and thank you Lynn, for putting us together.

Had my first quilt published and they contacted me, I still can't quite believe it.

Festival of Quilts by MariQuilts
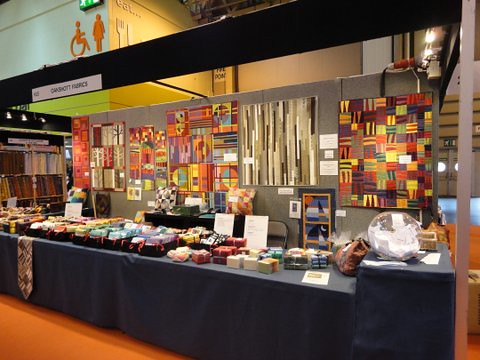
  • One of my quilts went for a visit to England...there it is, in the Oakshott Booth.

  • I entered that same quilt into a show for the first time....and we all know how that ended up....my first official rejection .  The best part of that experience was all the amazing comments from my fellow quilters and bloggers. You are all, simply the best!!!!

Naturally, that sore knee did NOT stop me from STARTING several projects....something that hopefully never changes.
So, in between making crazy amounts of design walls, here there and everywhere and starting new projects, it's been a wonderful year.


And of course...saving the best for last...a beautiful new granddaughter and an amazing new grandson. 

Thank you again, for your friendship and support.


All the best and Happy New Year.


Lily's Quilts
Marianne

P.S. I'm linking this post to Fresh Sewing Day at Lily's Quilts

Friday, December 28, 2012

We Regret to Inform You.....

Is rejection part of my quilting journey?  ABSOLUTELY!! 
 I know we all like to share the upside of the journey but what of the downside? 

We regret to inform you that your quilt......was NOT chosen. But is it really a downside? I believe it is an intrinsic part of the process.

When I started blogging two years ago my intent was to share my personal quilting journey with you...I don't want to start wavering on that mandate now, by Not sharing my "dear john quilt letter". 

So just how did that make me feel? I entered a quilt for the very first time, only to have it NOT be chosen. But but but.....how could they not choose my beloved Colour Shot???? I don't know. I think not knowing is probably the thing that gets me wondering. There's no interaction in this process, only the words.....We regret.

Will it get me down? ABSOLUTELY NOT. When I choose to put my work out there, rejection or criticism is part of the risk I am very willing to take. When I go to Quilt Con in February it will be interesting to see which quilts were accepted into the show...as I said, "it's all part of the experience." 


Wednesday, December 26, 2012

Another Christmas Gone By

After adding an extra table...who's table is ever big enough for Christmas? 
Crazy remote controlled fish flying through the house....
Furniture moved around in the strangest places, to keep my little grandson from pitching headfirst down the stairs....he's crawling everywhere now. 
A last minute sweater finished for that same little grandson
and I think we made it through Christmas....
not to mention the extra helpings of turkey and mashed potatoes.

I even found some time to take some shots of Strips on Stripes....my daughter brought it home from Montreal for me to photograph. 

Now maybe time to actually set some goals for 2013....
I'll let you know what I come up with. 

Thursday, December 20, 2012

Published!!

I'm feeling a little flustered and overwhelmed.

 When I started blogging two years ago, it never occurred to me that it would result in one of my quilts being published.
But here I am.....pinch me or am I dreaming??


Tuesday, December 18, 2012

I Was Starting to Wobble

Last week my Christmas Crabbiness was starting to creep up on me. Deadlines to meet, gifts to buy, multiple Christmas events and a sore knee that has me spending way to much time at the Chiropractor's office. 

And yes, Mr. Christmas was cranking up his usual Christmas cheer.

This week has me heartbroken over the recent tragedy in the States. I'm holding my little ones closer and pray that God will hold close the victims, of this senseless crime.

As my little granddaughters baked cookies with Grandpa, my thoughts kept going to the families that have lost so much.
Just a little more icing.... 
The Most Amazing Christmas Cookies Ever!
Even Mr. Christmas needed a nap after that event.
And he's not the only one.

It's so easy to take our loved ones for granted. My heart is heavy but thankful. 

Friday, December 7, 2012

Free Bee for October

Free Bee Block for Dan completed.

I ended up placing the circles at an angle and I'm not quite sure if that was the right move or not.

 But what's done is done. 


As you can see the "block" and I use that term loosely just sort of kept growing. It ended up being 34" x 14"or something like that.

Dan just gave us way to much freedom and of course true to form I got carried away. 

Wednesday, December 5, 2012

Easy Circles Part II

So what does one do with all these lovely circles??? 

Let me share my favourite way of stitching the circle to the quilt top. 
 
 One pin per circle is all I use.
 An open toe applique foot is really helpful in sewing down the circles.
 I've set my machine to an applique or blanket stitch and am using invisible thread.
Use regular thread in the bobbin.
I pressed my seams open for the back ground strips, in order to minimize bulk.
As you can see I've caught one of the seam allowances....something I try to avoid.
 There we are....one circle stitched down.
 Just relax and take your time.
 I've left the thin interfacing on the back of the circle so everything remains nice and stable as you're sewing.
Flip everything over and clip away the background layer being careful not to catch the front circle with your scissors. 
 
 Here comes the bonus of using this method. You have cut out a very usable second generation circle.
Even your interfacing can be reused. 

Following the steps in yesterday's post
Easy Circles Part I you can create another circle. 


There we are a smaller second generation circle...... 

I now have many many options when adding these little beauties to the quilt top, so much fun!!!


Hmm....let me see.

Tuesday, December 4, 2012

Easy Circles Part I

I finally started working on my Free Bee block for Dan (due a while back).
 My very first thought, when I saw the inspiration quilt was to make a pieced background of strips, with a row of appliqued circles on it. 

 One great advantage of appliqued circles is that you can move them around, on a pieced background, until you find an arrangement that you are satisfied with.  I'm still playing around.
My plan is to applique the circles and then cut away the striped fabric from behind the circles, to make smaller circles which will in turn be appliqued onto the solid circles....sounds confusing right??? I'm quite sure that was a run on sentence. It's actually very simple.

First of all, I'll walk you through my favourite way of making appliqued circles.

Making Appliqued Circles


Trace your circle onto a piece of very thin, non fusable interfacing.
As you can see, I've just used a pen. 
Pin the interfacing to the right side of the fabric....one pin is all I usually use.
Sew through all layers, on the traced line, using a regular stitch length. 
 Trim away the excess fabric and interfacing, leaving approximately 1/4 inch seam allowance.
Cut a slit in the interfacing being careful not to cut the fabric. 
 Turn right side out....just as if you were making a pillow case.
 Just run your finger along the inside of seam making sure everything is smoothly turned.
Lightly press, using steam. I usually use more of a patting motion with the iron, rather than a gliding motion. 
 
Turn over and press.  This method can be used for any curved shape.
 
Coming up: What to do with these circles.


LinkWithin

Related Posts Plugin for WordPress, Blogger...