Friday, August 31, 2012

What Does One Do????

Yes, what does one do, when one's sewing space....oh, what the heck, one's whole house is over taken, by out of town children, in town children visiting with the out of town children, a very pregnant daughter (due on Labour Day), grandchildren......oh yes, and the dog???

My solution is to set up a temporary sewing space in the seldom used dining room.......I neeeeed a little sewing time to calm me.
001 by MariQuilts

My daughter was a week over due with the last baby......yikes!!!!!!!

With all the chaos....I managed to register for Quilt Con. 

 The classes were filling up so fast, I was a little rattled.

quilt con modern quilt show and conference

 But yes, Leanne and I are off to Quilt Con in February...yippee!!! This is a first for me, I've not taken any quilting classes, before this. 

Always good to do something different....and the best part should be, meeting some of you.

Sunday, August 26, 2012

Free Bee August

I don't have a lot to show for last week, in the quilting world but it was one busy week. 

Three birthday parties for various friends...lots of grandchildren time and on and on. Real life does have a way of taking over sometimes. 

Next week doesn't look much better. My kids from Montreal arrive for a week on Tuesday...yippee and a new little granddaughter is due on Labor  day....how appropriate.

I did manage to spend a little time working on my Free Bee block for Leanne

As much as I'm liking this block, I think the neutrals are looking to busy for what  Leanne asked. So back to the cutting board.


 So here is the finished block....a little more neutralized 

Sunday, August 19, 2012

Working in a Series/The Progression of an Idea

Do you suppose, this might actually be a series? 

I just kept pushing one idea, and one thing led to another. Yes, I believe it is....the common denominator being, the appliqued strips.

It is my experience that the ideas, for the "next quilt" often start peculating as I'm working on a current project. 
 Often the ideas are related in some way, to what I'm working on. 

The ideas can be technique, colour, or theme driven etc. 
Perhaps that is how a "series of quilts" is born.


Thursday, August 16, 2012

Colour Explosion

My design wall has gotten quite the work out today.

Since I'm easily distracted I left this morning's project in the dust and started on these reverse, applique, circles...something I've been wanting to do for quite awhile.

We're going back to Alberta on the weekend..... so I just had to play a little more, before putting the studio back in order.


When In Doubt...Just Start Slashing

Don't worry...it's only fabric.
Things were starting to look way too botanical for my taste, so the option I chose was, get the rotary cutter and start slashing.
It will open up the project to numerous possibilities. 

Once the slashing is done, I like to audition several more fabrics, just to see what happens.


Who knows where things will end up.

Wednesday, August 15, 2012

Just Playing

Company's gone home, husband is off sailing, design wall is up...I just couldn't resist playing, with a little reverse applique.  

Tuesday, August 14, 2012

Carried Away....as usual

I had so much fun making this design wall, the other day.....I decided to make another one. I know, I have a tendency to get a little carried away with these things, but one can never have enough design walls.

 A number of you commented that you just don't have the space for a design wall...what about utilizing the space behind the door?
 
Sometimes, I just throw fabric on the design wall to get my creative juices flowing....sort of creating a colour story if you will. 
Here is something a little brighter.
It's a great way to use your design wall.

Saturday, August 11, 2012

Using Your Quilts

I'm definitely in the
"quilts are made to be used" camp. 

My West Coast Quilts really got some love this week.....
Add a little fun in the sun 
A Little Water Play 
 Chase a few ducks
Hug a dolphin

A lovely week with family.....so much fun.

Tuesday, August 7, 2012

Duct Tape......Who Knew!!!!/Design Wall Tutorial

Well, all you handymen, of course.....but was I listening, well frankly, NO.  I'm now officially a Duct Tape convert.

I've been putting off making this design wall forever.Why you may or may not ask....how hard can it be?? Well the answer is, there are two ways to do everything...the hard way and the easy way. I've made design walls before and trust me, I took the hard way. I came up with yesterday's floppy design wall because I wanted to avoid making the whole covered insulation type. But oh how I love a firm design wall versus a floppy one....alright take your minds out of the gutter. 

The reason I hated making this type of design wall, was that I actually tried gluing the batting to the insulation board with a glue gun....things melted...well dah!! My next approach was the staple gun, it got the job done, but a real pain to do.

Did doing the things the hard way end there.....well, what do you think? After covering these lovely insulation boards, they must be mounted....I thought sticky tape Velcro, maybe not. After stapling Velcro to the walls...to the boards and my fingers, the design wall was done and is still hanging...but not fun.

So after arranging and rearranging my West Coast Studio, in order to incorporate a design wall I was still trying to avoid the task of actually making one....a FIRM one, that you can stick pins in.....to combat that open window thing.


Last night I decided to bite the bullet and made plans to go to Home Depot. Just as I was about to leave,  Sandie emailed and reminded me of her fabulous tutorial on design walls. Rereading her tutorial got me thinking and reminded me of a few other tips I had read, since my earlier design wall fiasco. Believe it or not, I actually enjoyed making my wall this afternoon and I still have enough energy, left over, to share what worked for me.
I bought a package of six insulation boards, 3/4" x 14 1/2" x 48". The larger boards with the tongue and groove edges in Sandie's tutorial, were nowhere insight...so I went with I had used before. 
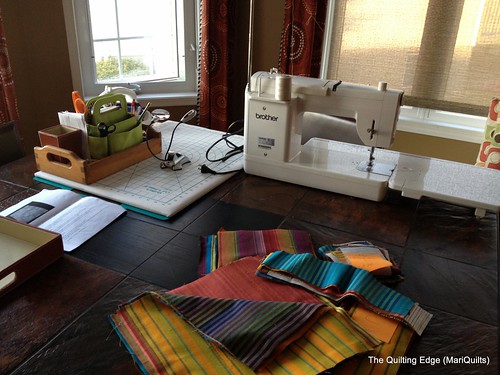
Supplies:
505 Temporary Fabric Adhesive
Insulation Boards
Duct Tape
Command  Picture Hanging Strips
Level
Batting
 
Cut strips of batting large enough to wrap around the edges of the boards. I wrap each board individually.
Spray some of the fabric adhesive onto the batting....this is really helpful for getting the batting on nice and smooth. 
 
Smooth the batting onto the board. 
Turn the board with the attached batting over and clip the the corners. 
Turn the edges of the batting to the other side of the board....this is where you will really appreciate the adhesive. Here I'm thankful to Sandie for mentioning the use of adhesive, in the first place. 
And here comes the use of the magical Duct Tape!! Just tape the edges of the batting down with Duct Tape. I don't remember where I read this tip, but it is fabulous. 
 
 Another fabulous tip, that I read somewhere else, in blog land is...Command Picture Hanging Strips. They work like a charm. If I find my boards on the floor in the morning, I'll let you know.....maybe I should check if everything is still hanging.

 Note: Attach the command strips as in the photo....half on the tape and the other on the board. This is how I attach mine and haven't had any fall of the wall yet (Sept 2/2013).
Using a level, draw a line, on the wall, where you want the top of your design wall to be. 
 Then just keep mounting as many boards as you need. I mounted four and covered the remaining two boards, from the package and left them free standing, for small projects. To me a firm empty design wall reminds me of a canvas just waiting for someone to create on. The wonky ones just don't do it for me.

Strange...considering how much I love wonky quilts.


Monday, August 6, 2012

Floppy Design Wall....beside an open window

I've discovered hanging batting, from a decorative rod, makes for a very floppy or should I say unstable design wall. 
Although, it's fabulous for displaying finished quilts. 

Since I often use the QAYG method, my blocks are somewhat heavier.
Hmm, I really should finish that quilt.

My plan is to attach the batting directly to the wall instead, thus eliminating all floppiness.

P.S. I jut walked back in the room....help, things are flying off left and right. The design wall is beside an often, open window!! 

 I might need some insulation board as well. Things are never as simple as they seem.


Friday, August 3, 2012

Quilty Knitting

Does my quilter's sensibility translate to my knitting??
You bet it does. 

I started this little sweater a few years ago.

 Now that I have a little grandson...maybe I should finish it.

This lovely knitting book is full of quilty knitting projects.

Even the bag, this project was hiding out in stored in....has a certain quilterly quality.

LinkWithin

Related Posts Plugin for WordPress, Blogger...