Wednesday, June 29, 2011

Deja Vu Wednesday

I was definitely having  a deja vu moment, as I tip toed down to my studio this afternoon. Toddler asleep....puppy asleep and I'm down here doing some nap time quilting. Wednesday is the day, I babysit my fifteen month old granddaughter and her new sheltie puppy. It brings back the days when I was home with my four little ones...nap times were sacred and often used for a little something creative.....


Look at what I accomplished........ I finally finished quilting all the squares for Lily's Quilts QAL. 

Here are the backs. Now I just have to join them all together.

Saturday, June 25, 2011

Tutorial/QAYG #6/ Adding Borders

Adding borders to a quilt, using one of the QAYG methods is nothing new.  I first saw this method about twenty years ago, on the sewing video,  Creative Strip Quilting by Nancy Zieman. When you see the simplicity of this method, you might be asking yourself.....WHY DIDN'T I THINK OF THIS???.

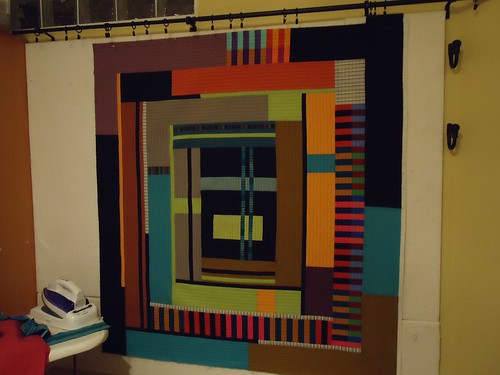
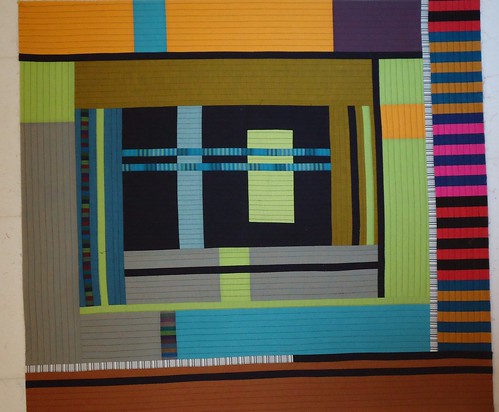
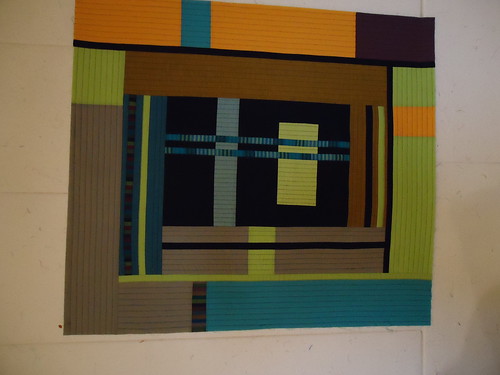
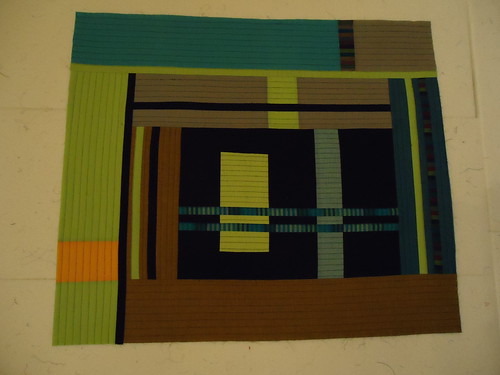
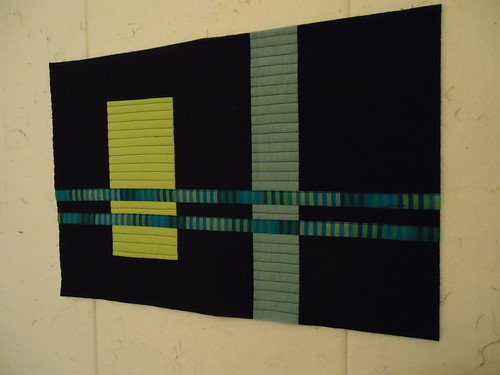
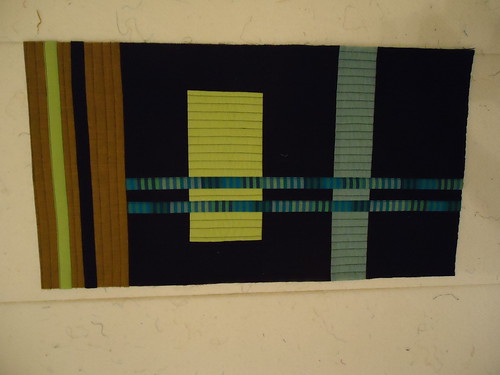
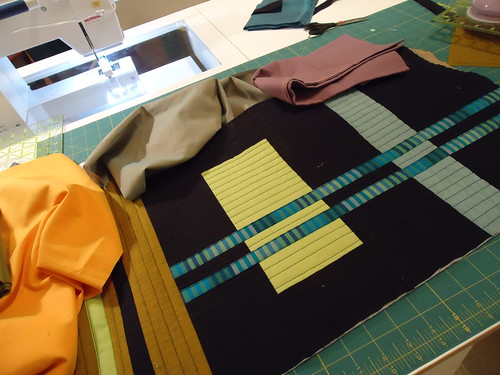
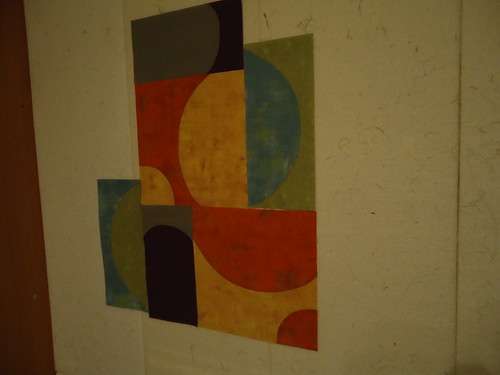
I made this center  in March using the "Stitch 'n Flip" QAYG method shown here.
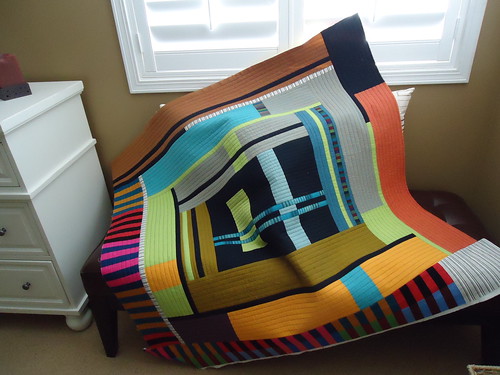
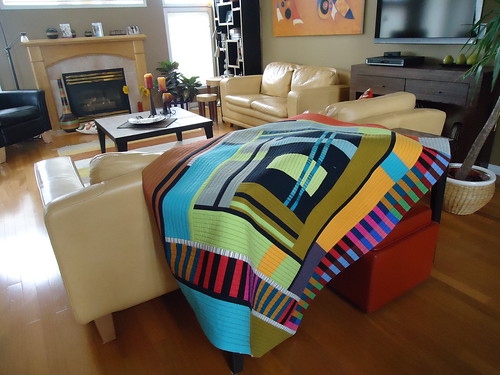
Here is the back.....some of it was quilted before the back was added and some after.  By doing it this way, some of the starts and stops that are characteristic of the "Stitch 'n Flip" method are hidden, under the backing. My sample is approximately 27" x 23" in size. It's important to remember to square up your center block. As with all the other QAYG tutorials I have put together I like to use a walking foot on my machine.

At this point, I am wanting to ADD SOME BORDERS, using the QAYG METHOD. Cut the fabrics, for the borders you want to add to your quilt, about 2" longer, than the edge you are adding to. For my quilt, I have cut a 6" wide strip, of each of the following:
  • Fabric for the front of the quilt (black fabric)
  • Fabric for the back of the quilt (white striped fabric)
  • batting (warm and natural)
Lay the fabric for the front of the quilt (black fabric), on top of the right side, of the quilt, along the edge, right sides together.

Next, lay the fabric for the back of the quilt (white striped fabric), on top of the back of the quilt, along the same edge, right sides together.

Be careful not to stretch your fabric....I like to use a fair number of pins for this step. Sew all the layers together using a generous 1/4 inch seam allowance

In the original instructions, the batting was added during this step.....DOING IT THAT WAY results in THREE LAYERS OF BATTING  in the SEAMS. That's just far to much bulk for me. In the original video, polyester fiberfill was used for batting and the bulk was not near as noticeable, as it is, for the Warm and Natural batting that I love to use. I DO NOT add the batting until this step is completed.

Here we see the three layers sewn together with a generous 1/4 inch seam allowance:
  • black strip (right side of quilt)
  • quilt that border is being added to
  • white striped strip (back of quilt)
NOW IS THE TIME TO ADD THE BATTING. Just butt the edge of the batting strip, to the edge that you have just sewn, using a wide zig zag stitch.

You are stitching, in the seam allowance, so nothing will show on the front or the back of the quilt.

Quilt Front.....detail of the zig zag stitching. 

Quilt Back

Now just flip the fabric strips, toward the batting, on the front and the back of the quilt and press. There is now only one layer of batting in the join.

Quilt Back

At this point, I put some basting spray between the layers to keep them from shifting, during quilting.

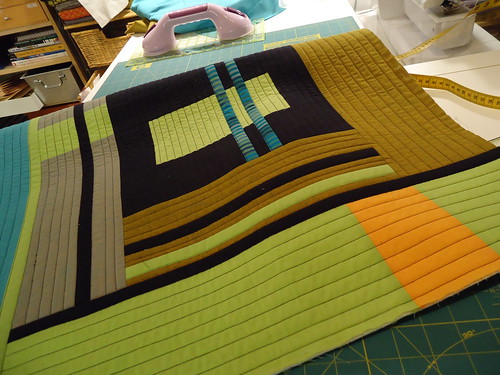
The next step is to quilt the border as desired. The major advantage is that you are always quilting at the edge of the quilt. No more wrangling a huge quilt, under the arm of your sewing machine.

Quilt Back
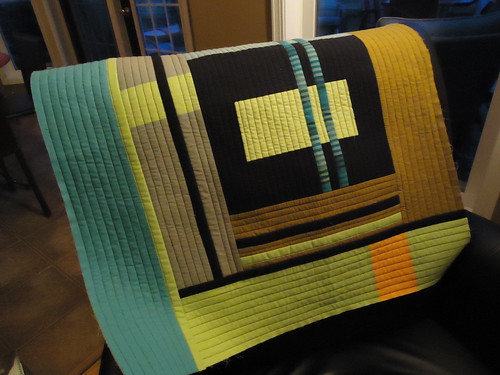
Once the border is quilted, I square up the border and start the process over again for the next  border.  

Every method has pros and cons and this one is no different.
Pros:
  • You are always quilting at the edge of the quilt, which gives you so much more control.
  • You are joining as you go along...nothing to put together later
  • You are quilting as you go along...nothing to quilt later
  • You can make a quilt larger after it is already quilted by just adding a few borders
  • You can make individual QAYG blocks larger this way as well
  • All machine sewing
  • No strips to sew on later to hide seams
Cons:
  • As the quilt grows, the borders have a tendency to be a bit wavy, if you aren't careful.
  • I would only recommend this for lap size quilts or smaller.

Sunday, June 19, 2011

Well Known Fact: People with Hobbies Have To Much Stuff

Why, Why do I do this to myself......see my new computer sitting there.   One new thing can  set  me off  moving everything around, and that is no small feat.  I have to many hobbies and to much paraphernalia that goes them.
As the computer came in, the what if I just thoughts came rushing in......such as what  if  I move the desk here and what if I move the book cases downstairs.......and on and on
Within the hour of that first dangerous thought....I have stuff piled everywhere.

And more stuff

And even more..this table alone is piled with knitting books and people, it's a huge pool table. What can I say, when I take up a hobby I like to educate myself.

These are the empty book cases, that I got my poor husband to drag down stairs...and on Father's Day of all things.
I started the morning off with a perfectly clean house and I have now, made enough work for myself, to last all week. As was I piling stuff everywhere I realized it is time to let go of a few things, and focus on my primary interests.

 
In the chaos, I manged to hook up the computer and write this post....I think I do know where my focus is these days.....quilting and blogging and quilting some more. Any related stuff gets to stay....the rest.....I think I might be making some trips to the Goodwill drop off.

Saturday, June 18, 2011

I Might Never Hand Sew... Binding Again /Project Monogamy


I might never sew my binding by hand again, thanks to Rita of  Red Pepper Quilts. I have always admired her crisp, neat bindings and all by machine. I thought I would give her method a try ......... so I reread her Binding Tutorial and gave it a shot. It works like a dream. I didn't bother zig zaging the edges or pinning anything, like she does, but it worked anyway.  I love it.
I couldn't resist a picture of the folded quilt.
So after practicing project monogamy I completed this quilt....binding and all, in twelve days. So satisfying...but sorry Chawne I can feel my wandering ways calling my name.....although it is so nice to have one finish for 2011.

Quilt Back 

Before my multiple project syndrome kicks back in...I will put together the promised tutorial, for the QAYG Log Cabin Quilt. My new computer arrived last night and I am typing at it, as we speak....so to speak.


Thursday, June 16, 2011

My Process Is Messy

QAYG Log Cabin 2011 by MariQuilts
QAYG Log Cabin 2011, a photo by MariQuilts on Flickr.

My process is fairly messy....
QAYG Log Cabin 2011 by MariQuilts
QAYG Log Cabin 2011, a photo by MariQuilts on Flickr.

I end up with piles of fabric all over the place.
QAYG Log Cabin 2011 by MariQuilts
QAYG Log Cabin 2011, a photo by MariQuilts on Flickr.

The further I am, into the project, get the worse it gets...fabric all over the floor, as I figure out my fabric choices along the way.

QAYG Log Cabin 2011 by MariQuilts
QAYG Log Cabin 2011, a photo by MariQuilts on Flickr.

I may have a messy process, but after a week and a half, the last border is on!!!! I just have to quilt that last border and I'll be ready to put on the binding. Now cross your fingers that I can get that done, before some other idea calls my name. If I get this done, it will be my first finish of 2011. It feels good to actually start and finish something quickly......whoops I guess I better actually finish, before I pat myself on the back.

About the tutorial.....my new computer is in the city....sent to my wonderful, computer guy, instead of to me and he has, believe it or not, gone fishing. Sort of sounds like the dog ate my homework type of excuse...but it's the truth...honest. Seriously, it is on the top of my to do list.

Monday, June 13, 2011

Instant Gratification

QAYG Log Cabin 2011 by MariQuilts
QAYG Log Cabin 2011, a photo by MariQuilts on Flickr.
There is definitely some instant gratification going on around here, as this quilt keeps growing.......

QAYG Log Cabin 2011 by MariQuilts
QAYG Log Cabin 2011, a photo by MariQuilts on Flickr.

and growing some more.

I might just finish this quilt before starting something else. I might actually practice project monogamy as suggested by Chawne.  We'll see what happens....if I do it'll probably be a one time thing.

  I can't link up like I usually do....still no computer.....but check out her blog, great post today. My computer is here and it's all linked now.

Also....I messed up with all my linking but this post is now linked to


 For July 1st at Lily's Quilts

Thursday, June 9, 2011

If you like to PLAN AS YOU GO......

QAYG Log Cabin 2010 by MariQuilts
QAYG Log Cabin 2010, a photo by MariQuilts on Flickr.

If you like to PLAN AS YOU GO..this might be the method for you. Two more borders added and quilted today. It's hard to believe I just started this quilt Tuesday Evening.


QAYG Log Cabin 2010 by MariQuilts
QAYG Log Cabin 2010, a photo by MariQuilts on Flickr.


Just a little closer view.


QAYG Log Cabin 2010 by MariQuilts
QAYG Log Cabin 2010, a photo by MariQuilts on Flickr.


Back of the quilt so far.

Tuesday, June 7, 2011

Growing the QAYG Log Cabin

It's been a long time since I've made this type of QAYG quilt.....I'd forgotten how quickly it grows, as you just keep adding the QAYG borders. It's still on my to do list, to write up a tutorial on this QAYG method.....but so are all kinds of other things, that aren't getting done around here.

Each border gets added and then quilted....I like not knowing what's coming next.

It's great quilting this way because you never have the bulk, of your quilt, under your machine. I'll keep you posted as it grows.....this is so addictive.

Monday, June 6, 2011

Decluttering My Brain

I might be making a mess in my sewing room with new projects started everywhere, but I think I'm decluttering my brain. Some of these ideas have been rattling around my head for months...it feels liberating to get them made into quilting swatches...for lack of a better name. The actual quilts will follow later...if the ideas are quilt worthy. Besides it's nice to have ideas, ready to go, during the times, my head is just plain empty...there are plenty of those days too.

QAYG Log Cabin 2011 by MariQuilts
QAYG Log Cabin 2011, a photo by MariQuilts on Flickr.

I'm working on a QAYG Log Cabin type quilt.


QAYG Log Cabin 2011 by MariQuilts
QAYG Log Cabin 2011, a photo by MariQuilts on Flickr.


I start with a center and just keep adding QAYG type borders.


QAYG Log Cabin 2011 by MariQuilts
QAYG Log Cabin 2011, a photo by MariQuilts on Flickr.

Here I am, just trying out a few more, of those lucious shot cottons....I'm using them on the back as well, and hope the quilt doesn't end up being to light weight.

Arnoldi Inspired 2011

Arnoldi Inspired 2011 by MariQuilts
Arnoldi Inspired 2011, a photo by MariQuilts on Flickr.


Here is a little better shot of my inspiration in the midst of my mess. I found an app to crop and fix photos on the ipad....all this playing around.....sooo addictive.

In the Midst of My Mess

Lately I have been very good at creating mess and still more mess.


But, in the midst of my mess, I did manage to find a little order.

And, in the midst of my mess, there usually lurks a little inspiration.

Inspired by the work of Chuck Arnoldi....lets see where this takes me, if I can get out from underneath all my piles of fabric and multiple projects.

Hopefully the quality of these pictures aren't to bad...still working from the ipad. My computer is definitely fried and I haven't quite figured out how to edit and crop photos on here yet.

LinkWithin

Related Posts Plugin for WordPress, Blogger...